Getting Started
Install Haveno
Haveno can be installed on Linux, macOS, Windows, or Android by downloading the installer for your system.
Note
The Haveno project does not provide installers directly, because it does not operate or endorse any mainnet network.
First find a third party network, and then download their installer.
Alternatively you can build from source by customizing these instructions with your provider's repository.
- First uninstall Haveno if it's already installed.
- Supports DEB, RPM, AppImage, and Flatpak.
Default install directory: ~/.local/share/
You must grant permission for Haveno to run on macOS:
- Open the .dmg installer and drag Haveno.app to your Applications folder.
- Open a terminal window (cmd + space then type "terminal").
- Copy and paste into the terminal:
sudo xattr -rd com.apple.quarantine /Applications/Haveno.appand press enter. - Enter your computer password.
- Right click /Applications/Haveno.app > Open. Repeat again if needed, even if reported as damaged.
Default install directory: ~/Library/Application Support/
- First uninstall Haveno if it's already installed.
- Run the .exe installer normally.
Default install directory: ~\AppData\Roaming\
After you already have a Tails USB:
- Enable persistent storage.
- Set up administration password.
- Activate dotfiles in persistent storage settings.
-
Execute the following command in the terminal to download and execute the installation script.
curl -fsSLO https://github.com/haveno-dex/haveno/raw/master/scripts/install_tails/haveno-install.sh && bash haveno-install.sh <REPLACE_WITH_INSTALLER_URL> <REPLACE_WITH_PGP_FINGERPRINT>Replace the installer URL and PGP fingerprint for the network you're using. For example:
-
Start Haveno by finding the icon in the launcher under Applications > Other.
Default install directory: /home/amnesia/Persistent/haveno/Data/
Haveno can be installed on Android via the Haveno app.
The APK is provided by the third party Haveno network you're using.
Run a Monero node (recommended)
For the best experience, running your own local Monero node is recommended, because the Tor network can be slow and unreliable when syncing with remote Monero nodes.
You can run your own Monero node by downloading the CLI from https://www.getmonero.org/downloads/.
Start Haveno Desktop
After installing Haveno, double click the application icon to start the application.
If you built from source, start Haveno with make haveno-desktop-mainnet.
It can take a moment to connect to Tor and sync with the Monero network.


Create a payment account
Before you can buy or sell, you must create at least one payment account.
Payment accounts define how you want to send or receive payment for XMR, whether by bank transfer, cryptocurrency, or other supported method like precious metals.
Go to the Account tab and click Add new account.
Choose your preferred payment method and enter your details exactly as they appear with your bank or provider. Then click Save.


Tips
- Make sure your details are accurate. Incorrect information can delay or prevent a trade.
- You can add more than one payment account at any time.
Fund your wallet (optional)
To create or take offers, you may either:
- Fund your Haveno wallet in advance, or
- Fund offers directly from an external wallet as needed.
To fund your Haveno wallet:
- Go to the Funds tab.
- Select the Receive funds sub-tab.
- Choose a subaddress.
- Copy the subaddress or scan the QR code to send XMR from an external wallet.
Funds are stored in your non-custodial Haveno wallet and can be withdrawn at any time.


Create or take an offer
On Haveno, you are always buying or selling XMR for another asset.
You can either:
-
Take an offer: Instantly accept an existing offer.
-
Create a new offer: Set your own price and payment terms.
Example: Buying XMR
In this example, we'll create an offer to buy XMR with USD using Zelle.
Navigate to the Buy XMR tab. Under the Fiat tab, select USD and click Create offer to BUY XMR.


Set your offer terms
- Amount of XMR to buy
- Price
- Trigger price (optional)
- Security deposit (default 15%)
- Any additional terms you want to apply
Click the Next step button to continue.


Fund your offer
To post your offer, you must deposit XMR in the sum of:
- A security deposit
- Trading fee
- Trade amount (if selling XMR)
You can deposit XMR from an external wallet or apply existing funds from your wallet.
When the trade completes successfully, the security deposit is returned to your main wallet.


Post your offer
After your offer is funded, confirm your offer details to post the offer.


Complete a trade
A trade begins when:
- Someone takes your offer, or
- You take an existing offer.
The payment step can begin after 10 confirmations (~20 minutes).
For example, if buying XMR with Zelle:
- The XMR buyer sends the Zelle payment to the seller.
- The buyer confirms the payment in Haveno.


When the XMR seller confirms that the payment was received, the trade funds are released to your Haveno wallet and the trade is complete.


Withdraw funds
You can withdraw funds from your Haveno wallet at any time.
To withdraw funds:
- Go to the Funds tab.
- Select the Send funds sub-tab.
- Enter a XMR address to withdraw funds to.
- Enter the amount of XMR to send.
- Click the Withdraw selected button.
- Confirm the transaction details to complete the withdraw.
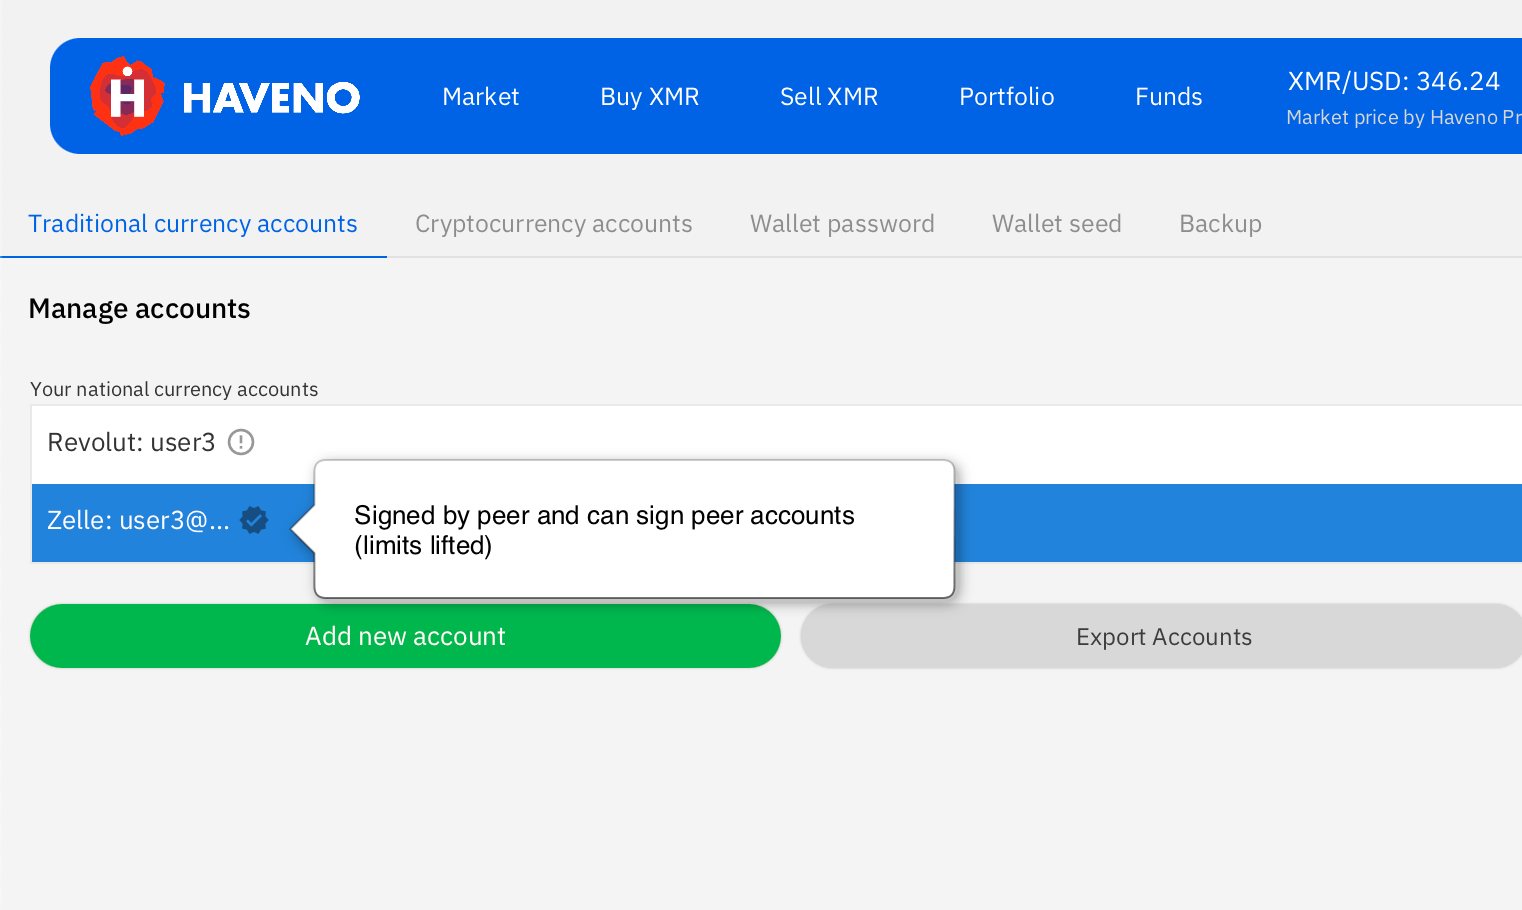
Account signing
Some fiat payment accounts can be signed in order to increase trading limits.
In order to sign a payment account, you must:
- Buy at least 0.05 XMR
- From a trader whose account is already signed
- Using a supported fiat payment account (with chargeback risk)
When your account is signed:
- Your account can sign other accounts.
- Your buy limit increases after 30 days.
- Your buy limit increases again after 60 days.
Note
- Not all payment methods support account signing (only those with chargeback risk).
- Signing is tied to a specific payment account.
- You only need to sign each payment account once.
Backup your application
A backup allows you to restore your wallet or trade history if your device is lost or damaged.
Backup your application folder
To make a complete backup of your application data, create a copy of your application's data folder.
The data folder contains:
- Trade history
- Payment accounts
- Application settings
You can create a backup of your application folder by navigating to Account > Backup.


Alternatively, you can copy your entire application folder to another location.
Default install locations
- Linux:
~/.local/share/Haveno - macOS:
~/Library/Application Support/Haveno - Windows:
%APPDATA%\Havenoor~\AppData\Roaming\Haveno
Backup your seed phrase
Your seed phrase can restore your main Haveno wallet.
However, the seed phrase is NOT a complete backup of all critical application data, like trade history, payment accounts, etc. To create a complete backup, you must backup your entire application folder.
To view your seed phrase, go to Account > Wallet seed.
- Store it securely.
- Do not share it.
- Anyone with your seed can access your funds.


Warning
The seed phrase is NOT a complete backup of the application.
To create a full and complete backup, you must backup your entire application folder.